In this article:
Overview
The Adaptiva Tool Foundry allows for Administrators to convert workflows into standalone executables (.exe). These executables can then be run manually, either by double-clicking (options dependent) or from the command-line. They can accept input parameters and can be configured to run on the local machine, a hard-coded machine or on a machine specified at runtime.
This allows Administrators to build powerful integrations into other applications, to automate routine tasks, provide orchestration capabilities to administrators and to empower end-users by allowing them to execute predefined administrative tasks.
Tool Foundry tools can be either server-side workflow based or client-side workflow based meaning that they can either run on the Adaptiva Server itself or on Adaptiva Clients. This allows for client-side invocation but server-side execution. For example, let's say the administrator wishes to provide a Tool that will retrieve something from a SQL database. Instead of having to grant every PC appropriate rights to query SQL and ensuring that all network communication is allowed from every location, the Admin can simply create a server-side workflow that queries from SQL and returns the desired results. The clients can then invoke that workflow and retrieve the results from the server.
Getting Started
Before creating a Tool Foundry tool, an appropriate workflow will be required. For assistance with creating workflows, please see the Technical Reference Library section.
The workflow may have input properties (user-defined properties on the Start node) and it may also output different return codes upon execution (ResultWholeNumber on the End node).
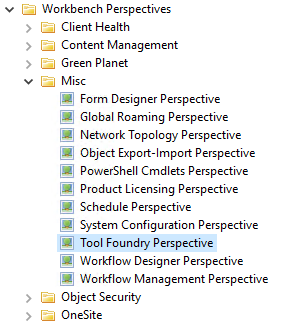
Once an appropriate workflow has been created, the Tool Foundry Tool can be created using the Tool Foundry Perspective under the Misc folder in the Adaptiva Workbench. Navigate to Misc > Tool Foundry Perspective.
Creating the Workflow Execution Policy
Tool Foundry executables execute workflows but in order to allow execution of these workflows, a policy must be created.
Before creating the Custom Tool, a workflow execution policy must be created.
On the right-hand side of the Tool Foundry Perspective, towards the bottom there are two tabs, the ServerWorkflowExecutionPolicyExplorer tab and the ClientWorkflowExecutionPolicyExplorer tab. Depending on whether the workflow to run is a Server workflow or a Client workflow, select the appropriate explorer tab.
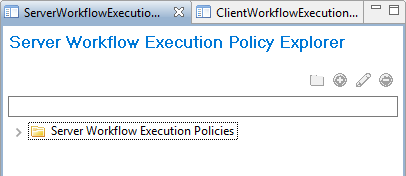
Then, either right-click any folder and choose Create New Policy or click the green + icon to create a new policy.
The ServerWorkflowExecutionPolicyEditor or ClientWorkflowExecutionPolicyEditor will appear and prompt for data.
Server Workflow:
For a server workflow only two fields are required. The server workflow must be specified by clicking on the Add button to the right of the Server workflow box. Also, optionally a password can be specified. This would require a password to be entered before the workflow would run.

Client Workflow:
For a client workflow, the same two fields are present as with the Server workflow but with a client execution policy it is also possible to specify the scope of machines on which the workflow will be allowed to execute. This can be set to any collection or group. Alternatively, the tickbox Use All Adaptiva Clients can be selected which will allow the workflow to execute on any client.
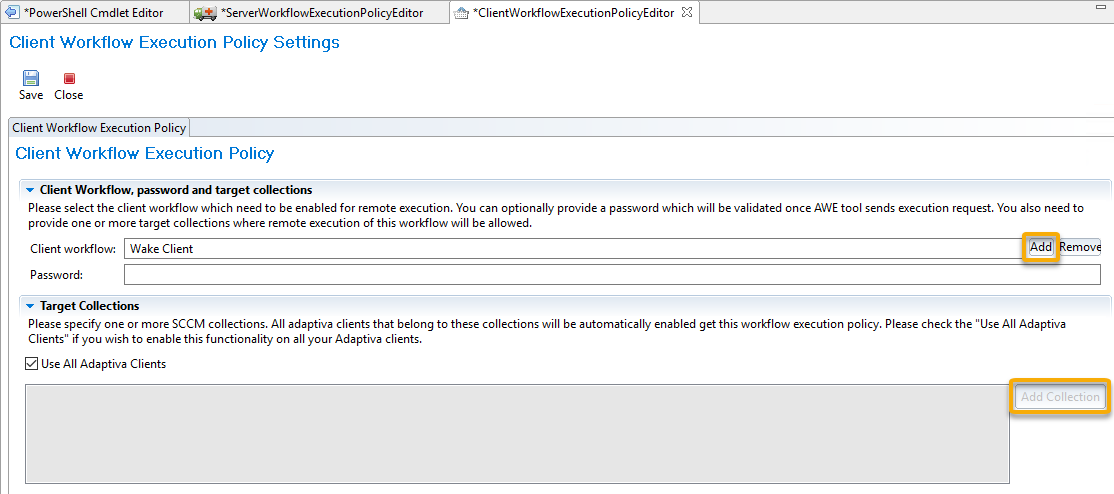
Note: In this example, no execution password is specified
After setting the field data, click Save to save the workflow execution policy. This will send the policy to the devices that have been targeted and instruct them to allow execution of the specified workflow when requested.
The Workflow Execution Policy Settings window can then be closed.
Creating the Custom Tool
To create a new Tool Foundry executables, in the Tool Foundry Task Navigator, select Create New Custom Tool.
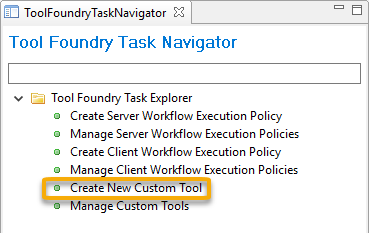
This will open a new blank Custom Tool Editor page in the central view.
Tool Name And Location
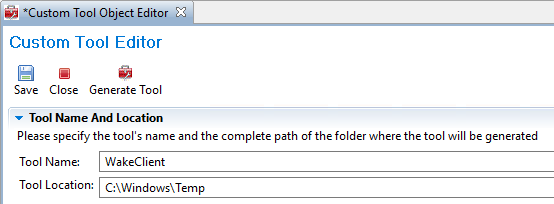
The first thing to set in this new view is the name of the tool to create. This will be the name of the executable (for example, entering 'WakeClient' in this box will generate a custom executable called WakeClient.exe). As such, the name can be anything that is a valid Windows executable name.
For this example we are using a workflow that can send a wake-on-LAN magic packet to a machine to wake it from an offline/sleep state.
The second thing to set is the Tool Location. This should be a path, relative to the connected Adaptiva Server where the tool will be output (created). For example, entering C:\Windows\Temp in this field will create the file C:\Windows\Temp\WakeClient.exe.
The location field should contain a valid folder path and supports both local paths (local to the Adaptiva Server) and UNC paths.
Remote Workflow Execution Policy Settings
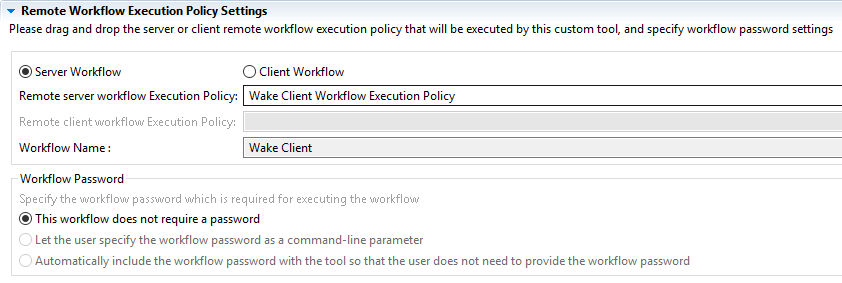
The next step is to select the workflow execution policy that was created earlier in the Creating the Workflow Execution Policy section.
Select the radio button corresponding to the correct type of workflow (Server/Client) and then select the workflow execution policy for the workflow.
Depending on whether a password was specified as part of the execution policy, one of three options will be available:
- This workflow does not require a password (only option available if no password was specified in the execution policy)
This option allows the tool and workflow to execute without having to specify a password on the command-line.
- Let the user specify the workflow password as a command-line parameter
This option requires the user to enter the password that was specified in the workflow execution policy on the command-line as part of the execution command. Specifying this option enforces that the tool must be run from a command-line and cannot be double-clicked to run.
- Automatically include the workflow password with the tool so that the user does not need to provide the workflow password
This option includes the password within the tool itself. This option allows the tool and workflow to execute without having to specify the password but still includes the password within the tool so that the tool can be made inert by changing the password in the execution policy.
Target Machine Settings
The next section defines whether the tool will execute the workflow on a specific device, or on a device that is specified by the person running the tool at runtime.
There are two options available:
- Let the user specify the Adaptiva server or client machine name or IP address as a command-line parameter
If this option is specified, then the name of the machine to run the workflow on must be specified as a command line parameter. Selecting this option enforces that the workflow must be run from the command line and cannot be double-clicked to launch.
If this option is selected then the behaviour is as follows:
- Command is run from the command-line on Machine A and targets Machine B
- Machine A sends a remote workflow execution request to Machine B instructing it to run the workflow that is part of the execution policy.
- Machine B receives the notification, downloads and executes the workflow
- Machine B sends back the result data (properties of the End node of the workflow) to Machine A
- Set the Adaptiva server or client machine name or IP address to the following fixed value
If this option is selected then the workflow will run on the machine that is specified in the 'Adaptiva Server or Client Machine Name or IP Address' textbox.
This textbox can accept an IP, NetBIOS name or FQDN and it can also accept LOCALHOST to enforce the tool to run on the same device that it's launched from.

Usage Description
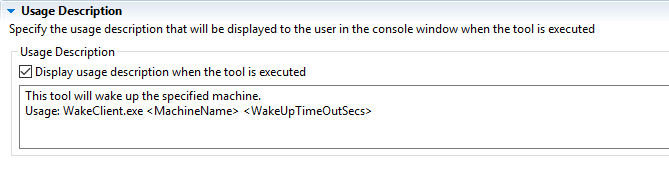
[Optional] It is possible to optionally set a usage description for the tool. When the tool is run from the command-line, the usage description will be shown. This allows the administrator designing the tool to provide guidance as to the tool's usage such as the intent, the syntax, the order for input properties etc.
Command-Line Parameters
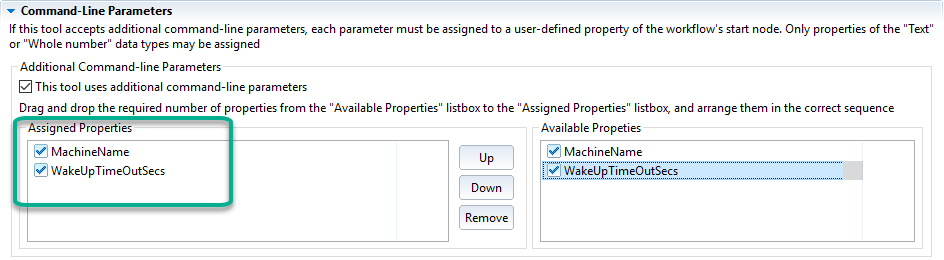
In this section it is possible to add command-line parameters that have been added to the workflow. Any command-line parameters that get assigned will be required when executing the command-line.
During workflow design, command-line properties can be assigned by adding user-defined properties of type TEXT or type WHOLE NUMBER to the Start node of the workflow. Any valid properties will then show up in the Available Properties selection box of the command-line parameters section.
To assign one or more of these available properties, simply drag the respective property into the Assigned Properties selection box on the left.
The order in which the properties are defined in the Assigned Properties box defines the order in which the properties must be specified on the command-line.
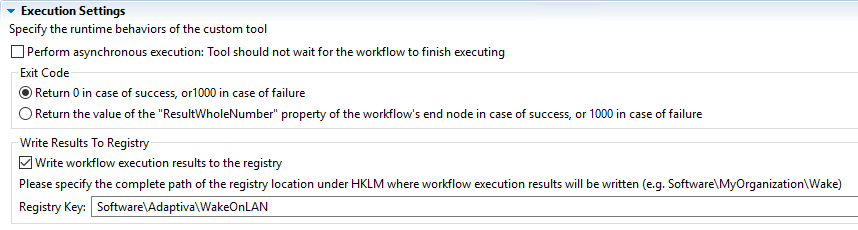
Execution Settings
The final section is the execution settings. In here there are a number of different options.
Asynchronous Execution
If this checkbox is checked then the workflow will run asynchronously and will not wait for the tool to finish before returning. This is useful in the case where the workflow should be started on a machine and then main execution of any other tasks continue without waiting for the results to come back.
Exit Code
When the custom tool finishes running it will return an exit code. This exit code will determine success and failure and can be used for reporting or determining where in the workflow it exited.
There are two options:
- Return 0 in case of success, or 1000 in case of failure : This is the default option. If the workflow is successful then the tool will exit with return code 0. If it fails, it will exit with return code 1000, regardless of any configuration or settings within the workflow itself.
- Return the value of the "ResultWholeNumber" property of the workflow's end node in case of success, or 1000 in case of failure : In this case, the tool will exit with the value of the ResultWholeNumber property on the End node of the workflow in the event of success. If unhandled workflow failure occurs then the tool will exit with return code 1000.
Write Results To Registry
If the checkbox 'Write workflow execution results to the registry' is selected then the results will get branded into the Windows Registry, in the key specified in the 'Registry Key' textbox.
The key should be the path under HKEY_LOCAL_MACHINE and should not contain the HKLM part itself.
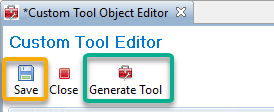
Execution
After populating Custom Tool Editor with the desired settings, simply Save the tool and the click Generate Tool at the top of the editor.
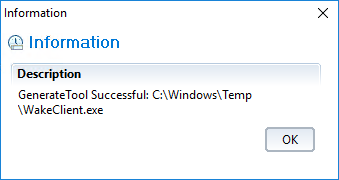
A message box will popup to say that the Tool was successfully generated
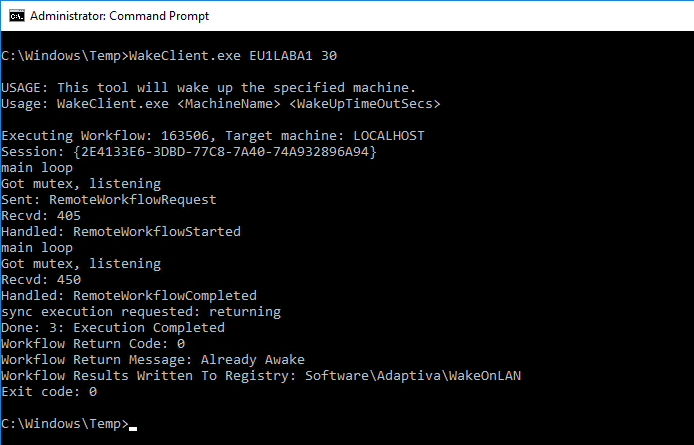
Next, locate the tool and either run it via the command line, or, if the configured options allow (i.e. nothing needs to be specified on the command-line such as the machine on which to run, the password or any command-line parameters), launch by double-clicking.
Note: The custom tool (.exe) itself does not perform the operations itself. The tool sends an instruction to the AdaptivaClient (either locally if the local machine is specified, or to the Adaptiva Client of the remote device if a remote machine is specified) requesting it execute the workflow.
Because the workflow will run under the context of the AdaptivaClient, the command window used to execute the custom tool does not need to be run as Administrator.
Registry Branding (Optional):
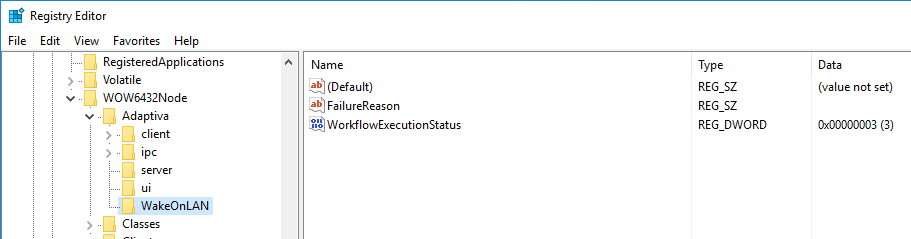
Please note that the results will get branded into the 32-bit registry hive.
Syntax:
The full execution syntax with all available options specified is as follows. The order applies regardless of options specified:
ToolName.exe [TargetMachine] [Password] [Param1] [Param2] [Param3] ...
Examples:
MyCustomTool.exe LOCALHOST Password123 PC1 13 "My Long String"
MyCustomTool.exe PC14 Password123 PC22 1441 "Parameter 3"
Comments
0 comments
Please sign in to leave a comment.